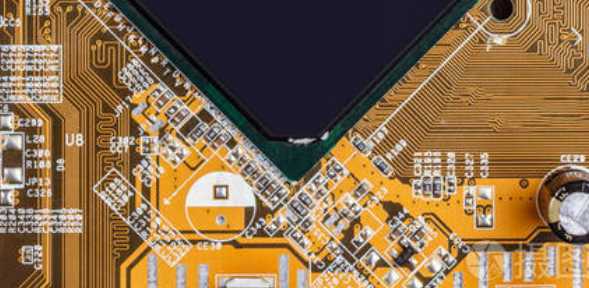
The next step is to place the components and locate them based on thermal management, function, and electrical noise factors. After the outline of the component and the location of the interconnect are assigned, the first component placement step begins. After each component is placed, it should be reviewed and adjusted immediately to facilitate wiring and optimize performance. Layout and packaging sizes are often reconsidered and changes are made at this point based on size and cost. Components that absorb more than 10 mW or conduct more than 10 mA should be considered powerful enough to take into account other thermal and electrical factors. Sensitive signals should be separated from noise sources through a flat surface and kept impedance controlled. The power management module uses the ground plane or the power plane for heat flow. Make high current connections according to acceptable connection voltage drops. Layer conversions with high current paths should use two to four throughholes at each layer conversion and multiple throughholes at layer conversions to improve reliability, reduce resistance and inductance losses, and improve thermal conductivity.
Heat dissipation problem
The heat generated by the IC is transferred from the device to the copper layer of the pcb (Figure 3). The ideal cooling design will make the entire circuit board the same temperature. The thickness of the copper, the number of layers, the continuity of the thermal path and the area of the circuit board will directly affect the operating temperature of the components.
To reduce the operating temperature easily, use multiple layers of solid ground or power supply directly connected to a heat source with multiple through-holes. Effective heat transfer allows heat to be evenly distributed from the heat source to the entire PCB board, thus significantly reducing the temperature.
In the case of uniform heat distribution, the following formula can be used to estimate surface temperature:
P = (heat convection) x area x (ΔT)
Explanation:
P = power consumption on the board
Area = circuit board (X axis x Y axis)
ΔT= Surface temperature -- ambient temperature
Heat convection = convection constant based on environmental conditions
Fine-tuning element placement
Components should be arranged in the following order: connectors, power circuits, sensitive and precision circuits, critical circuit components, and then in the following order. The schematic is built around each part on the pcb and is fully interconnected. The routing priority of a circuit is selected based on power level, noise sensitivity, or generation and wiring capabilities.
Typically, the wireline widths are 10 to 20mil for carrying 10 to 20 mA, and the wireline widths are 5 to 8 mil for carrying currents less than 10 mA. High frequency (greater than 3 MHz) and rapidly changing signals should be carefully considered when wiring with high impedance nodes.
The designer should examine the layout and should iteratively adjust the physical location and routing path until the circuit is optimized for all design constraints. The number of layers depends on the power level and complexity. Add layers in pairs because the copper cladding is made in this way. Power signals and planar wiring, grounding schemes and the board's ability to be used as intended affect operation.

Final inspection should include verification that sensitive nodes and circuits are properly shielded from noise sources, that solder resistance is present between pins and through holes, and that the screen print is clear and concise. When stacking layers, use the first inner layer below the component side as ground and assign the power plane to other layers. The stack is created in such a way that the board is balanced with respect to the middle point of the Z axis.
Consider any problems encountered by the pcb designer during the review process and correct the pcb based on the feedback generated from the review. A list of changes is created and validated during each audit iteration until the board is finalized. Use the Design Rule Checker (DRC) to keep design errors correct throughout all phases of the layout. DRC can only catch programmatically monitored errors, and DRC rulesets often change based on individual designs. At a minimum, the design rule check should cover the spacing between packages, the unconnected network (the name that identifies each node in the circuit), the short-circuited network, whether there is an air gap, if the holes are too close to the pad, if the holes are too close to each other, and if the vertical clearance is violated.
There are many other important DRC rules that can be set to ensure robust design, and they should be studied and understood. For example, keep the gap at 5mil or above. Through holes should not be located in surface mount pads (unless backfilled). In addition, the solder shield shall be located between all solder joints.
Cost is often the driving factor behind pcb design, so be aware of the cost increasing factors in pcb manufacturing. A typical pcb board is two to four layers, has no boreholes less than 10mil in diameter, and has a minimum gap and line width of 5mil. The standard FR-4 should also be 0.062 inches thick and the copper foil should weigh 1 oz. Additional layers, super thick or sheet metal, through holes in the pad, backfill through holes (preferably non-conducting due to conductivity limitations and thermal expansion differences), blind/buried holes and lead times all add to the total cost.
pcb design should begin with an understanding of the manufacturer's capabilities. When designing manufacturable PCBS, IC companies are usually contacted regularly regarding functionality and cost reduction techniques.
summarize
pcb design can be complex, but with a little skill and practice it is possible to design a quality circuit board.


