Inspection of components after SMT chip assembly
For rear part inspection SMT PCB assembly
With the progress of circuit assembly technology and the rapid growth of electronic product demand, based on PCB, how to accurately detect surface mount assembly SMA, such as knowability, measurability, process control degree of component or product assembly quality, etc It has become the focus of circuit assembly technology and quality engineers, and then vigorously carry out relevant research to produce an automatic detection technology and equipment for circuit assembly board online testing Especially with the technical support of computer software and hardware, network communication, instrument bus, testing and measurement, SMA detection system has also made a great leap At present, the detection of shape memory alloy has always focused on the self inspection of circuits and chip circuits, structural testing and process control technology in the assembly and welding process, and has shown a trend of high precision, high speed, fault statistical analysis, network, remote diagnosis, virtual testing, etc Development direction
1. Inspection contents of components after assembly
Circuit board

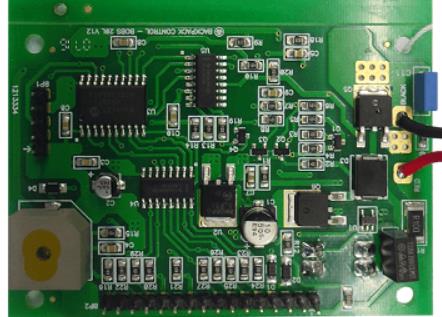
After surface assembly, final quality inspection of surface assembled parts is required. The inspection contents include: quality of solder joints, such as bridging, faulty soldering, open circuit, short circuit, etc.; Element polarity, element type, excess value, allowable weighing range, etc.; Evaluate the performance of the system composed of the whole shape memory alloy component at the clock speed, and evaluate whether its performance can meet the design objectives.
LED lighting patch processing 005
2. Inspection method of components after assembly
1) On line needle bed test method ICT
In the actual production of SMT, in addition to welding defects caused by unqualified solder joints, component polarity errors, component type errors and values exceeding the nominal allowable range will also cause defects in shape memory alloys. ICT is a contact test method. In this case, the performance test can be carried out directly through the online test ICT in production, and at the same time, relevant defects affecting its efficiency can be checked, including bridge connection, virtual welding, open circuit, component polarity error and value out of tolerance. And timely adjust the production process according to the exposed problems.
(1) Test preparation means that testers, test boards, test equipment, test files, etc. should be prepared.
(2) Programming refers to setting test parameters and writing test programs.
(3) Test program refers to the inspection of test program.
(4) Testing refers to testing driven by the test program to check possible defects.
(5) Debugging refers to that during the actual test program design, some steps will be judged invalid due to the selection of test signals or circuits of tested components, that is, the measured values exceed the deviation limit and must be debugged.
2) Flying needle test method
Flying probe test belongs to contact test technology and is also one of the test methods in production. The flight probe test uses 4 to 8 independently controlled probes, and the unit under test (UUT) is transmitted to the testing machine through a belt or other UUT transmission system, and then fixed. The probe of the tester contacts the test pad and the through hole to test the individual components of the UUT. The test probe is connected to the driver and sensor to test the components on the UUT through the multiplex system. When testing components, other components on the UUT are electrically shielded by the probe to prevent reading interference. The flying needle test is the same as the needle bed test. It can also perform power performance tests and detect defects such as bridging, virtual soldering, open circuits, component polarity errors, and component failures. According to its test probe, it can conduct all-round angle test, and the minimum test gap can reach 0.2 mm, but the test speed is slow. The flying pin test is mainly applicable to SMAs that are not suitable for ICT, such as high assembly density and small pin spacing.
3) Functional test method
Although various new detection technologies emerge in endlessly, such as AOI, X-ray inspection, and online testing of electrical efficiency based on flight probes or needle beds, they can effectively discover various defects and faulty PCB assembly processes during the testing process, but they cannot evaluate them The system composed of the whole circuit board can work normally, and the function test can test whether the whole system can reach the design goal It takes the surface mounting plate or the test unit on the surface mounting plate as a functional unit, inputs electrical signals, and then detects the output signals according to the design requirements of the functional unit This test is to ensure that the circuit board can work properly according to the design requirements Therefore, functional testing is the main method to detect and ensure the final functional quality of products
The above is the explanation given by the editor of pcb circuit board company.
If you want to know more about PCBA, you can go to our company's home page to learn about it.
In addition, our company also sells various circuit boards,
High frequency circuit board and SMT chip are waiting for your presence again.


